Event Phases in JavaScript: Capturing, Target and Bubbling Explained

Have you ever added a click listener to a button, but the parent div also fired? You did not click the parent — so why did it fire? The answer is event phases. And once you understand how events travel through the DOM, everything clicks into place.
In this article I will walk you through all three phases — capturing, target and bubbling — with code examples.
First — What is a Browser Event?
A browser event is when something happens on the page and the browser responds to it. A click, a keypress, a scroll — these are all events.
In JavaScript, there are 3 ways to write events:
Inline
Using event property
Using event listeners
1. Inline — directly in HTML:
<button onclick="doSomething()">Click Me</button>
2. Using event property:
button.onclick = function() {
    console.log("clicked")
}
3. Using addEventListener — the recommended way:
button.addEventListener("click", function() {
    console.log("clicked")
})
addEventListener accepts 3 parameters:
The event name
The callback function
Options — this third one is what controls the phase
element.addEventListener("click", callback, false) // bubbling — default
element.addEventListener("click", callback, true)  // capturing
The third parameter is called useCapture:
false : listener fires during bubbling phase — this is the default. If you do not pass anything, it behaves as false.
true : listener fires during capturing phase — event is caught on the way DOWN before it reaches the target.
So if you want to catch the event before it reaches the target — pass true. If you want to catch it after it fires at the target and travels back up — pass false or nothing.
What are Event Phases?
When you click on an element, the event does not just fire at that element directly. It travels through the entire DOM tree — top to bottom, fires at the target, then travels back up bottom to top.
This journey happens in 3 phases.
Phase 1 — Capturing (Top to Bottom)
By default, event listeners do not listen in the capturing phase. To listen during capturing, pass true as the third argument:
element.addEventListener("click", callback, true) // capturing phase
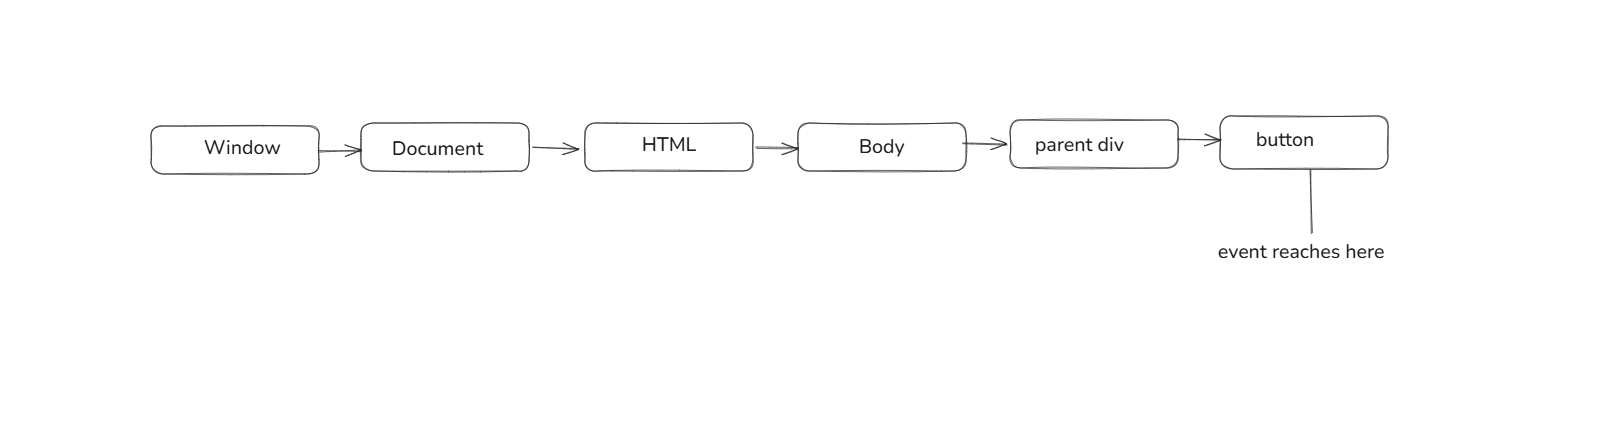
Capturing phase — top to bottom
Phase 2 — Target Phase
The event reaches the exact element that was clicked. This is called the target. The event fires here.
button.addEventListener("click", function(e) {
    console.log(e.target) // the element that was actually clicked
})
Phase 3 — Bubbling (Bottom to Top)
After firing at the target, the same event travels back up through every parent — all the way to the Window.

By default, addEventListener listens in the bubbling phase. That is why when you click a child, the parent also fires — the event bubbled up.
Seeing All 3 Phases in One Code Block
Here is one complete example that shows all three phases together. Read the comments carefully — each listener belongs to a different phase:
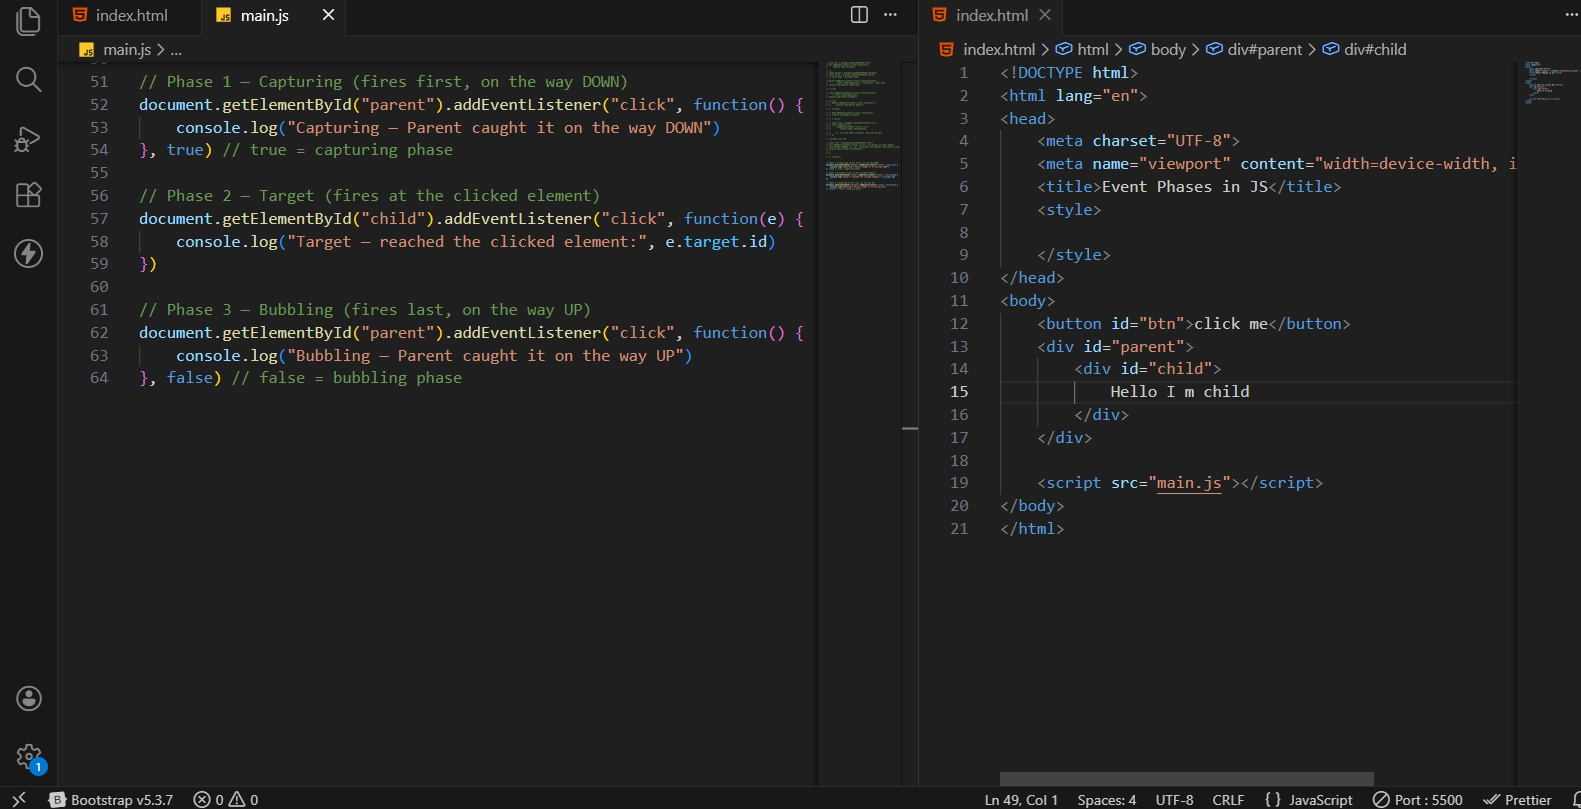
Output :
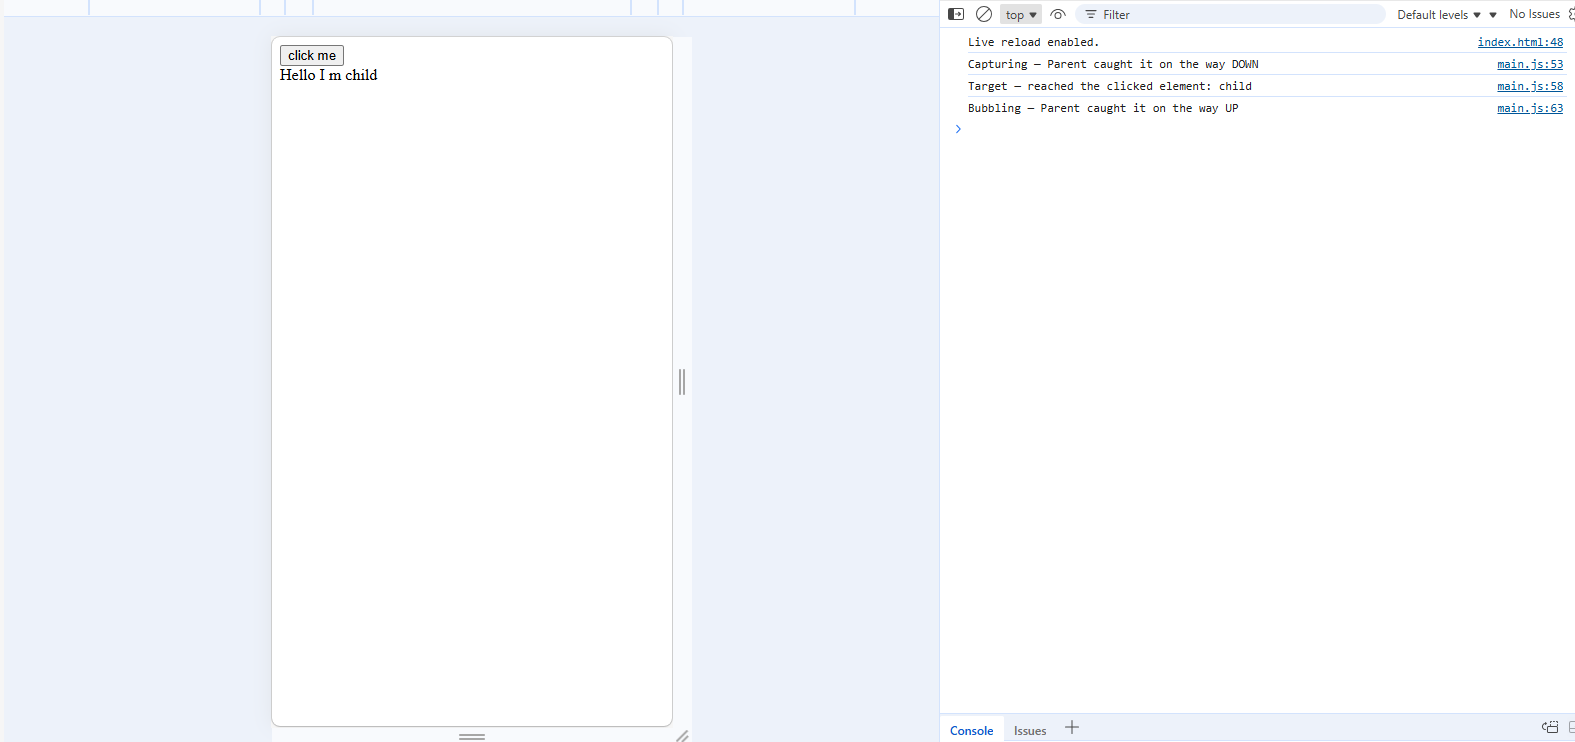
Notice the order — capturing fires first, then target, then bubbling. That is the exact order the event travels through the DOM.
Run This Yourself in VS Code
function simulateEventPhases(target) {
    console.log("--- Capturing Phase ---")
    console.log("Window → Document → HTML → Body → Parent →", target)
    console.log("--- Target Phase ---")
    console.log(target, "clicked!")
    console.log("--- Bubbling Phase ---")
    console.log(target, "→ Parent → Body → HTML → Document → Window")
}

simulateEventPhases("Button")

OUTPUT :
--- Capturing Phase ---
Window → Document → HTML → Body → Parent → Button
--- Target Phase ---
Button clicked!
--- Bubbling Phase ---
Button → Parent → Body → HTML → Document → Window
stopPropagation — Stop the Event from Traveling
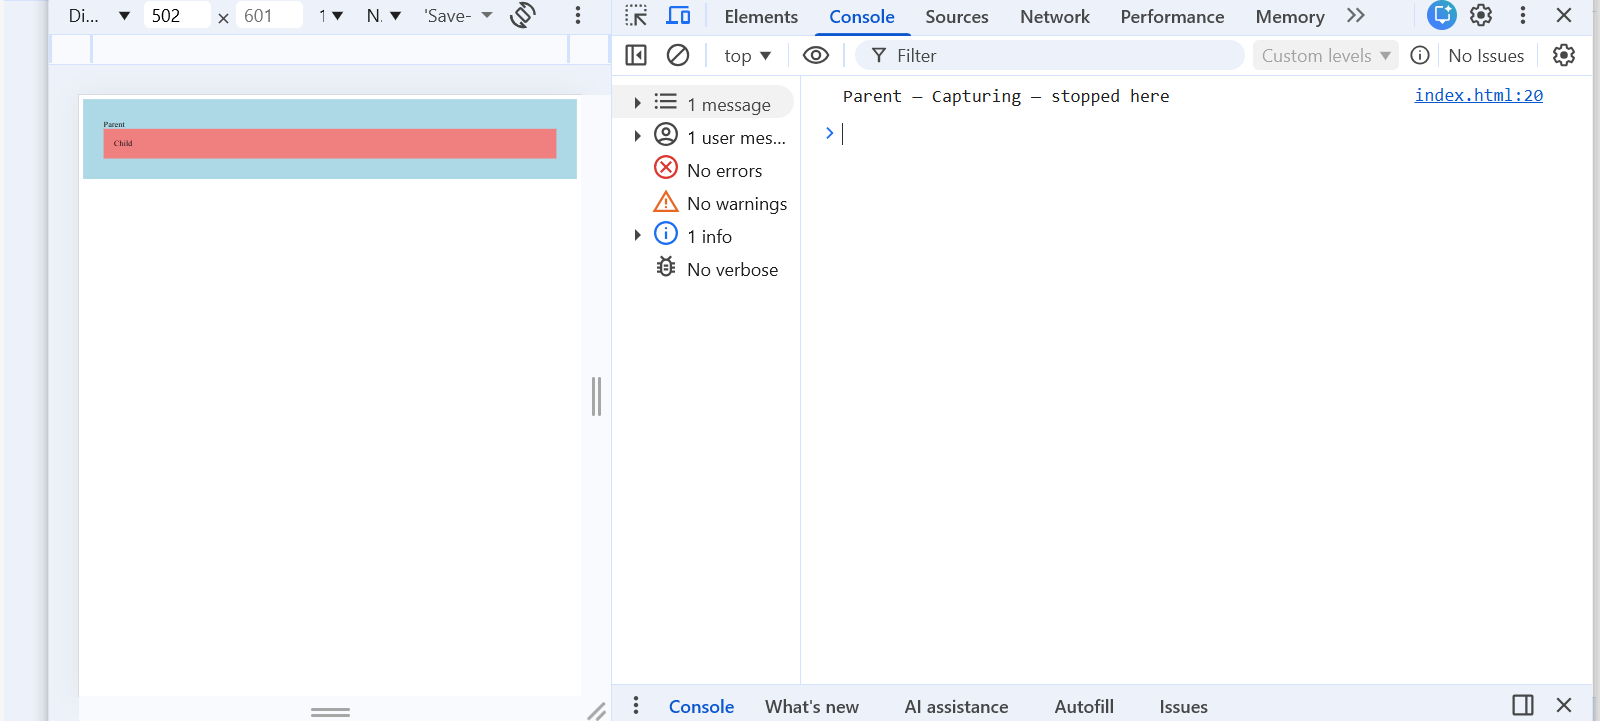
Sometimes you do not want the event to travel further up. You can stop it using stopPropagation.
document.getElementById("child").addEventListener("click", function(e) {
    e.stopPropagation()
    console.log("Child clicked — stopped here")
})

document.getElementById("parent").addEventListener("click", function() {
    console.log("Parent clicked")
})
Without stopPropagation the event bubbles up and parent also fires. With stopPropagation the event stops right at the target and does not travel further.
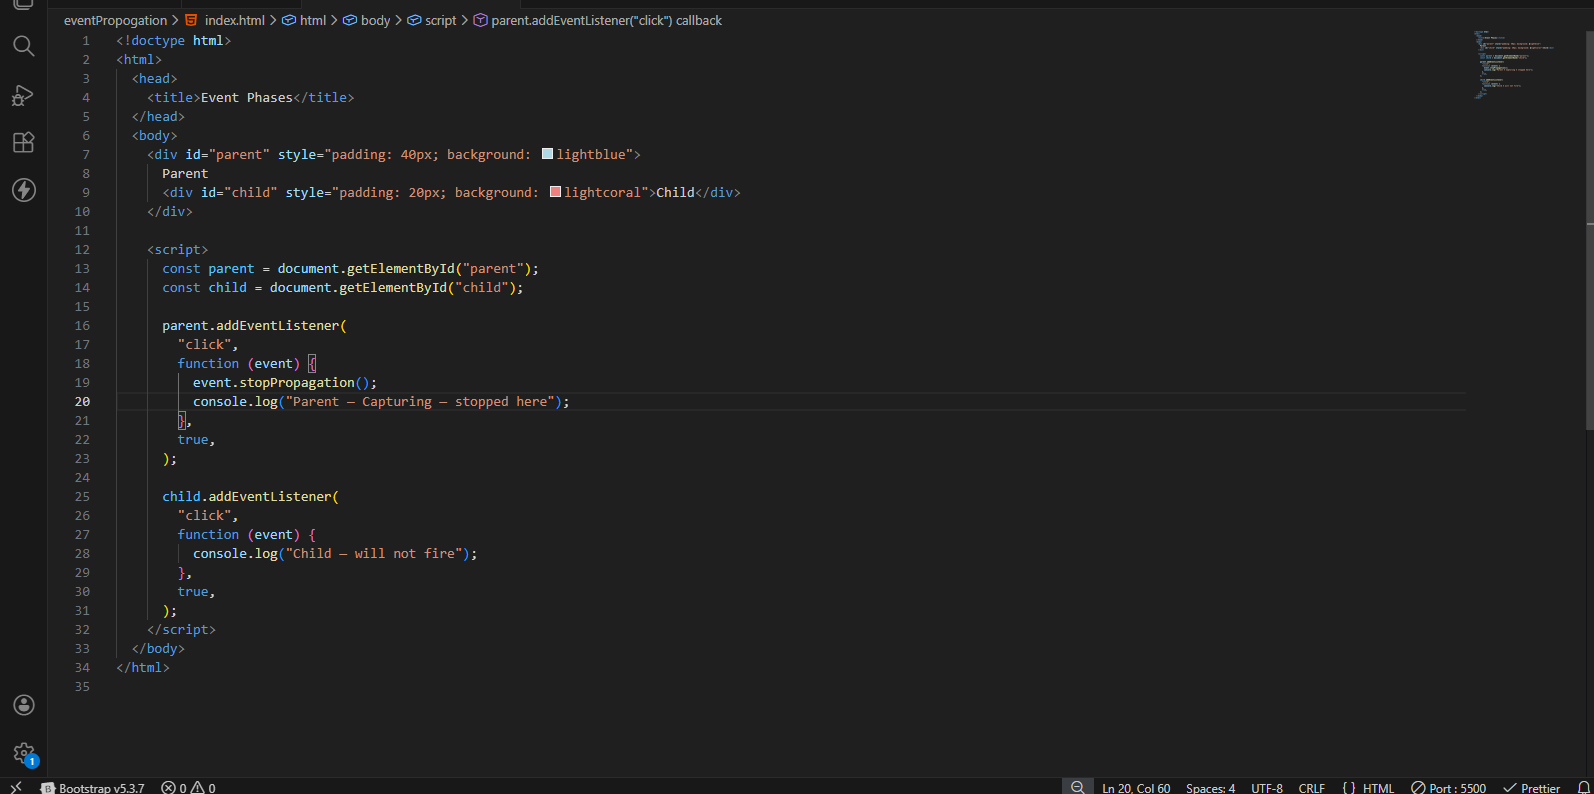
Output:
child - will not fire ---will not be displayed as event stops before this.
Event Delegation — Using Bubbling Smartly
Since events bubble up, you can put one listener on the parent and handle all children from there. This is called Event Delegation.
<ul id="list">
    <li>Item 1</li>
    <li>Item 2</li>
    <li>Item 3</li>
</ul>
Without event delegation — adding listener to every li:
document.querySelectorAll("li").forEach(item => {
    item.addEventListener("click", function() {
        console.log("Item clicked")
    })
})
With event delegation — one listener on parent:
document.getElementById("list").addEventListener("click", function(e) {
    if(e.target.tagName === "LI") {
        console.log(e.target.innerText + " was clicked")
    }
})
This works because of bubbling — when li is clicked, the same event bubbles up to ul and fires there. One listener handles all children — even ones added dynamically later.
| Phase | Direction | Default |
|---|---|---|
| Capturing | Window to target | Not active by default |
| Target | At clicked element | Always fires |
| Bubbling | Target to window | Active by default |
Types of Events
Mouse Events — click, dblclick, mouseover, mouseout
Keyboard Events — keydown, keyup, keypress
Browser Events — scroll, resize, load
Form Events — submit, change, input, focus, blur
Conclusion
Every event in JavaScript travels through three phases — capturing, target and bubbling. By default, your event listeners fire during the bubbling phase. Understanding this helps you control event flow, stop unwanted propagation and use patterns like event delegation effectively.
The next time a parent fires when you only clicked a child — you will know exactly why. And you will know exactly how to stop it.


